Level & Game Design
UE5 & Blueprints | Personal Project
About the Project
The goal of this project was simple, to practice Level Design & Game Design, in that order. I didn’t want a full project from scratch where I would, knowing who I am, get bogged down doing other types of design or programming tasks and lose focus on what skills I wanted to practice and add to my portfolio.
That’s not to say the other elements are unimportant or something I don’t want to better learn, simply that I wanted something I could iterate on quickly without having to worry about entire systems, animations, UI, etc that would pull be away from level or game design.
The simplest solution then was take the basic game I had started as part of tutorial to learn Unreal and make it a three step process: Add a mechanic, design levels, build levels, repeat. All while trying to avoid losing focus on the target: Level & Game Design.
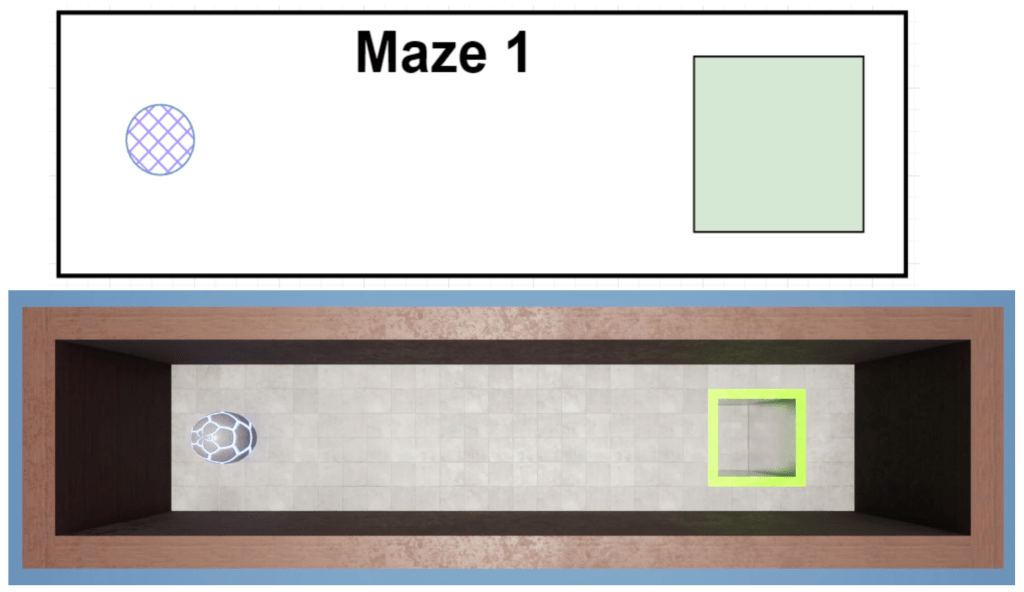
The original project I started with can be seen here, although there isn’t a ton of surface level difference to look at. I kept the 3 mazes I originally made as part of the tutorial.
About the Game
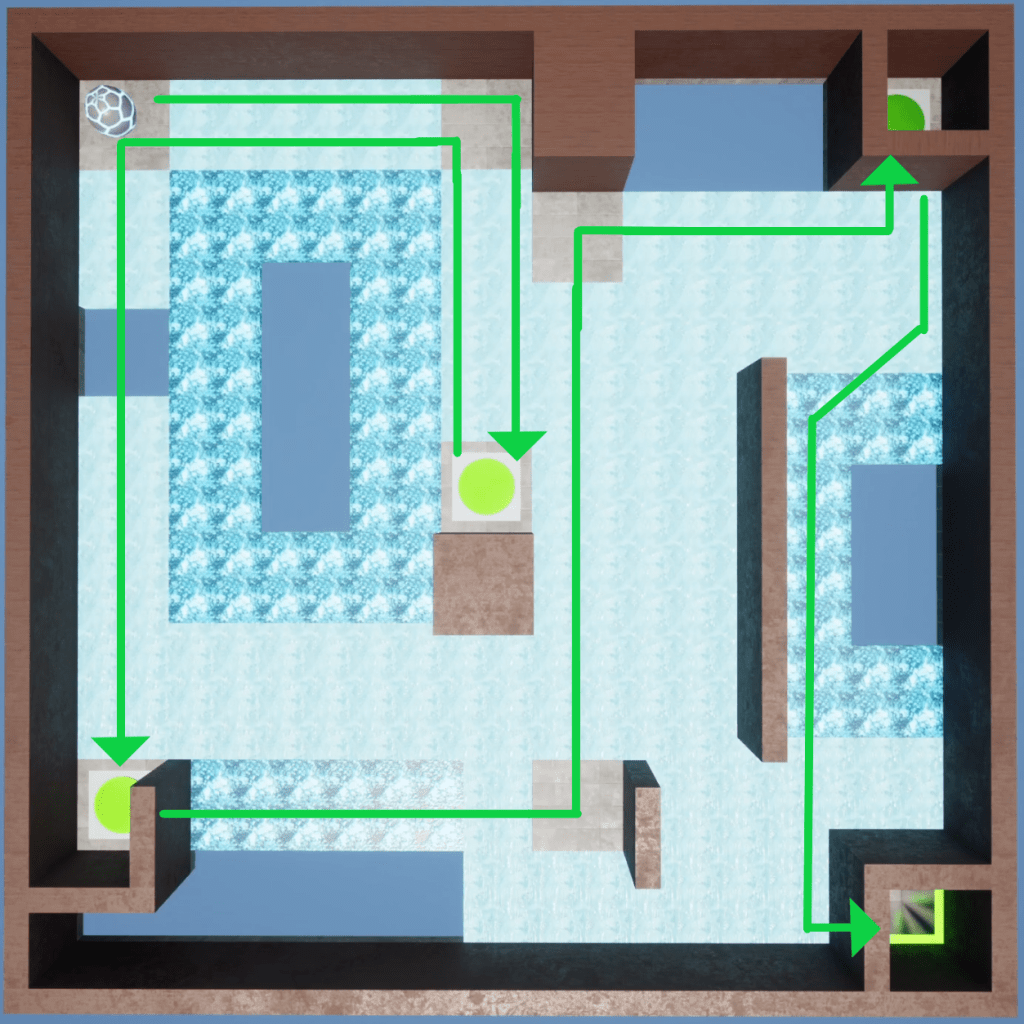
Marble Run is a simple puzzle game where players rotate a board in order to roll a ball to the end of a maze.
Specifically in my case it’s designed for PC with a mouse for control, there is also a reset level button & a basic UI for level select and exiting the game.
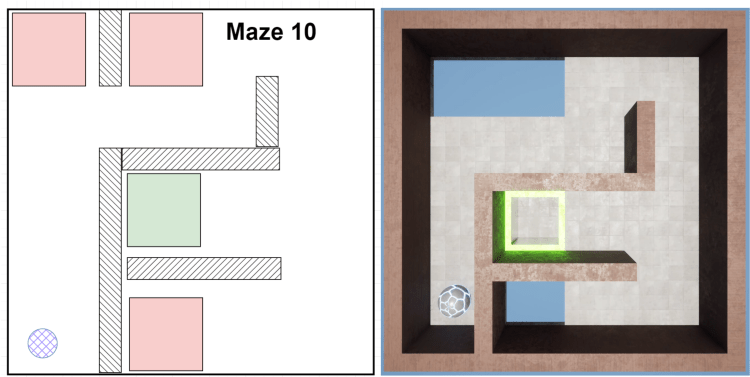
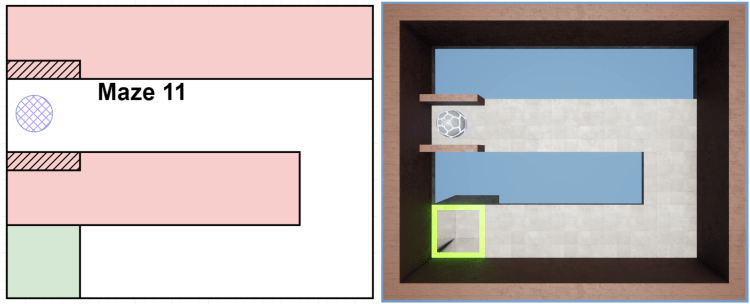
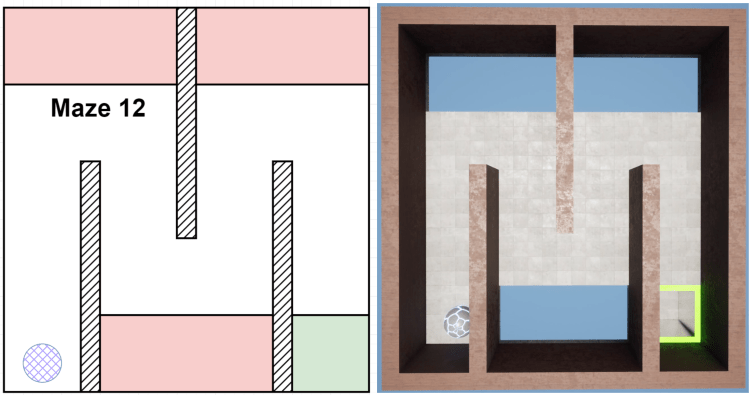
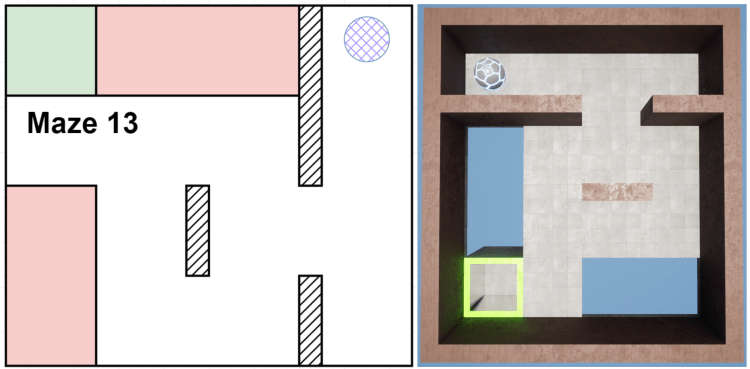
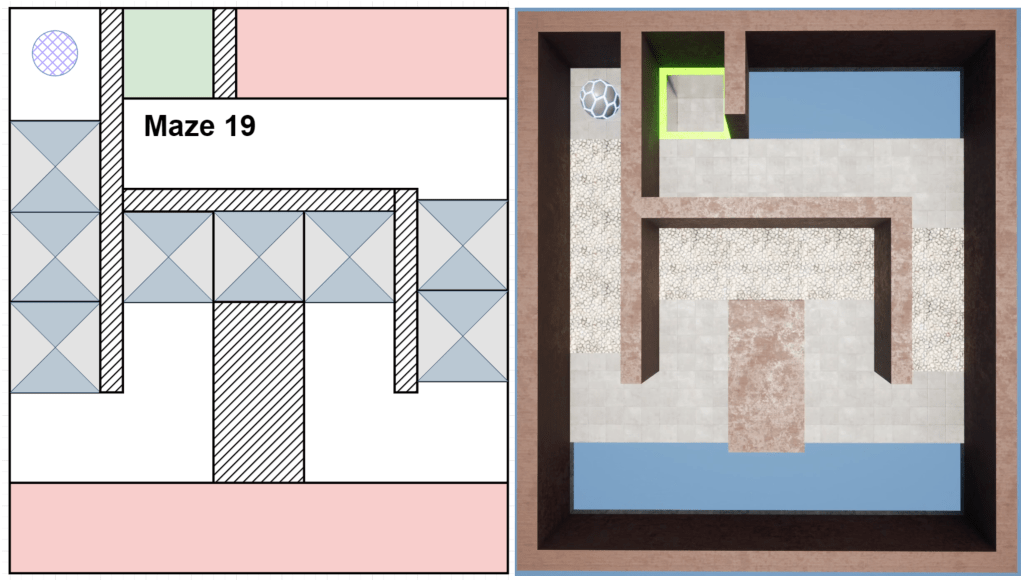
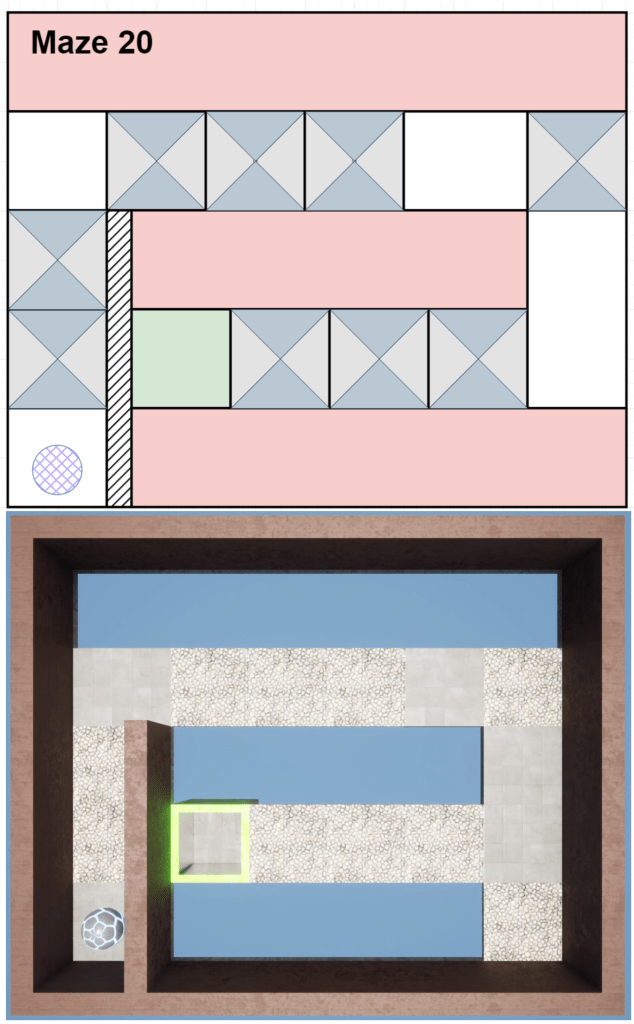
Mazes are numbered in the order I built them in-engine, separately from the level they are placed in. I tried to build them in the order I felt best for progression but used the separate naming convention so that if I swapped the order of the mazes it didn’t necessitate file name changes and the order could be tracked in documentation more easily.
Contributions
Everything outside of the initial control-scheme set up & most of textures.
The tutorial taught the method/tools for creating levels and the foundational code, such as the controls to rotate the maze and the trigger for level complete, but everything else was done by me.
The textures primarily came from the starting assets in Unreal, the ice textures came from the free Infinity Blade: Ice Lands content pack from Epic Games. A few textures were duplicated and then modified slightly by me.
Level Breakdowns
I decided to split my levels up into different Zones, each one with 10 levels (except Zone 1). Each zone would introduce and then expand on a new mechanic or hazard, for the sake of simplicity I’ll be using the term mechanic for any new gameplay element.
Zone 1 – Getting Started

Design Overview
Simple levels with no real challenge, players just have to navigate the maze. The main goal is to familiarize the player with the controls.
Originally I had these 5 levels and then started 5 with holes for the player to avoid but didn’t like the flow of introducing a new mechanic halfway through a section of levels. I never went back to make another 5 levels as I didn’t find this zone very interesting, but ideally I would make more for the sake of numerical consistency. I also never decided if I wanted to take 5 of the more difficult levels and remove the added mechanics to create 5 “new” basic levels or if I would create 5 new levels from scratch.
Many of my early levels suffered from not knowing what I was doing not having a fully understood design philosophy or process in place. My level mock-ups also suffered and aren’t a 1-1 scale as I was still figuring out standard measurements which made actually building them in-engine take longer than it should have; an issue I corrected as I developed my process.
Zone 2 – Holey Roller
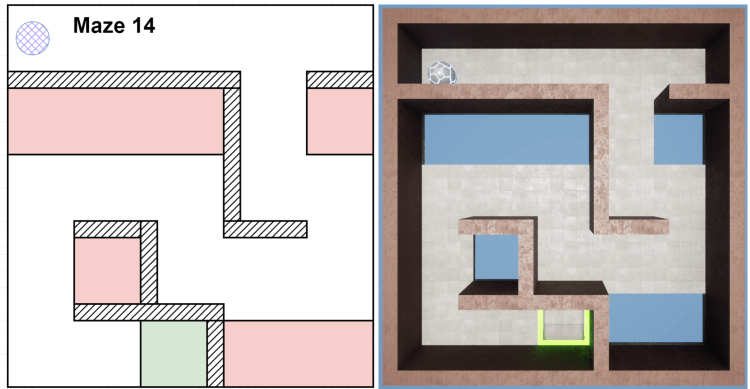
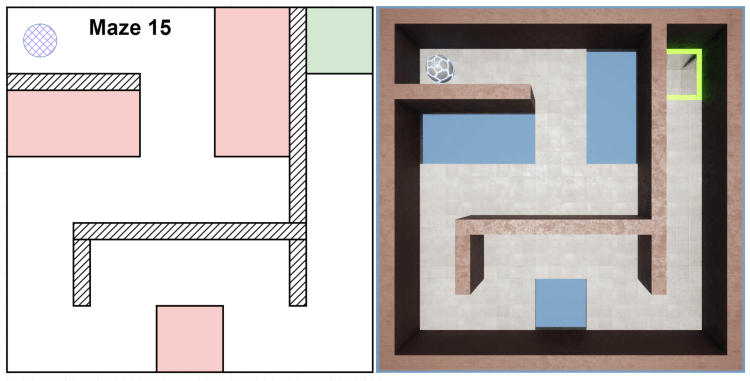
Design Overview
New Mechanic: Holes
The main goal of this section is to encourage increased player control, but not necessarily force the issue. Overall players need to have better awareness and improved control.
I wanted to ease players into the increased difficulty and so many of these levels were designed with the idea that the player could “cheat” by using the walls to avoid most of the holes. Players could take as much time as they wanted as there was no mechanic forcing to move fast, only to move in a controlled manner.
Level Deep-Dive
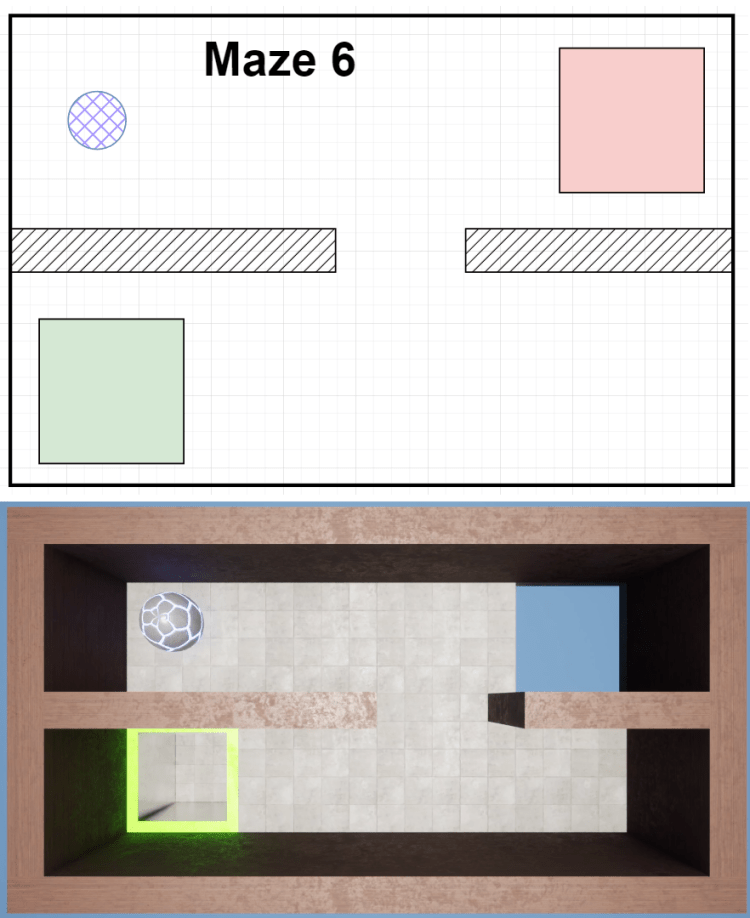
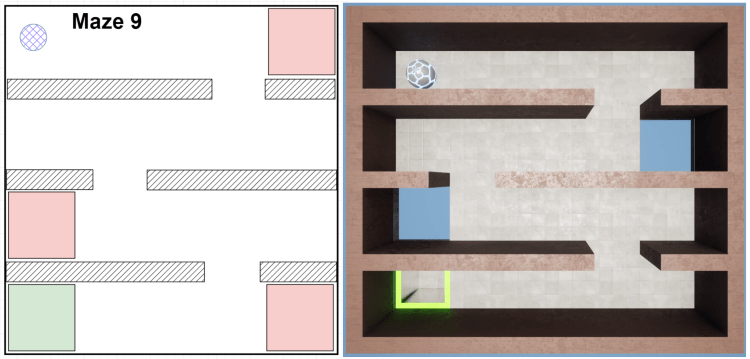
The best example of my design philosophy here is Maze 9 (Level 2-4). The player can focus on controlling the ball and rounding the corners in Method A, which has the risk of rolling directly into a hole then, or aim for the corners and roll into the walls with Method B. It’s not overly complex decision making, but it gives the player a safer option while they are still mastering the controls.
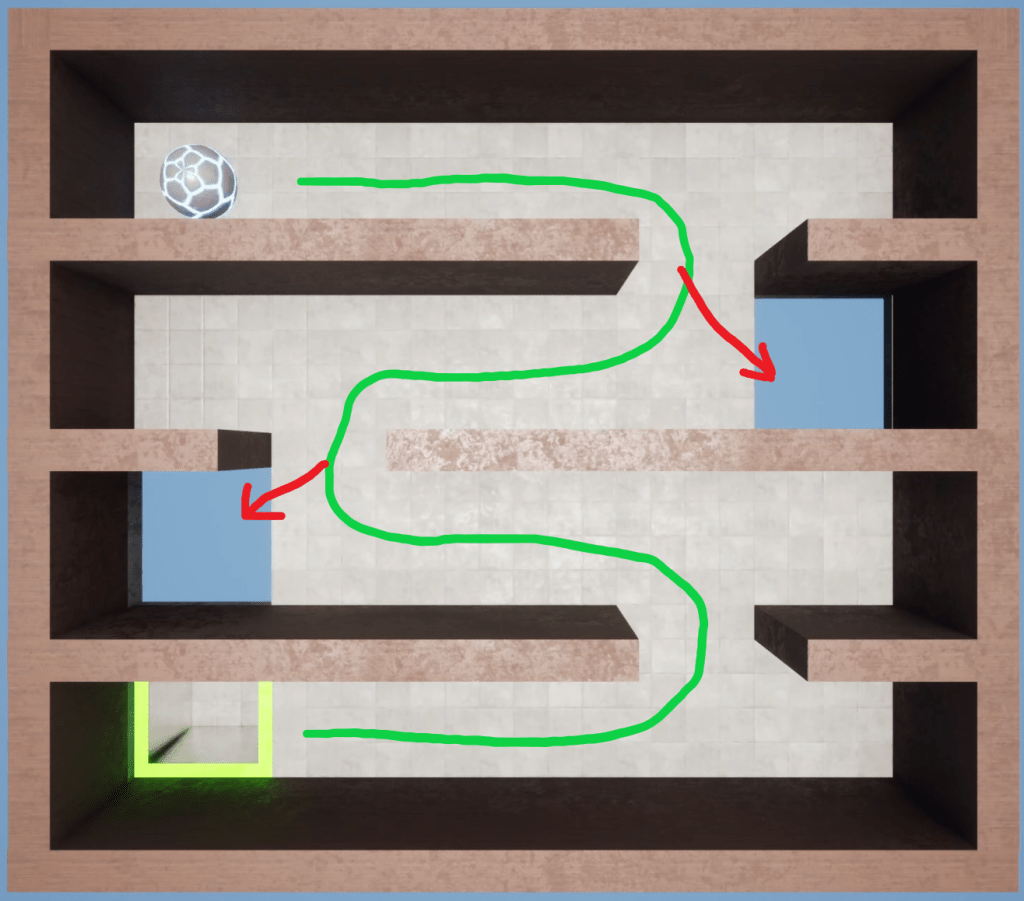
Method A (Controlled)
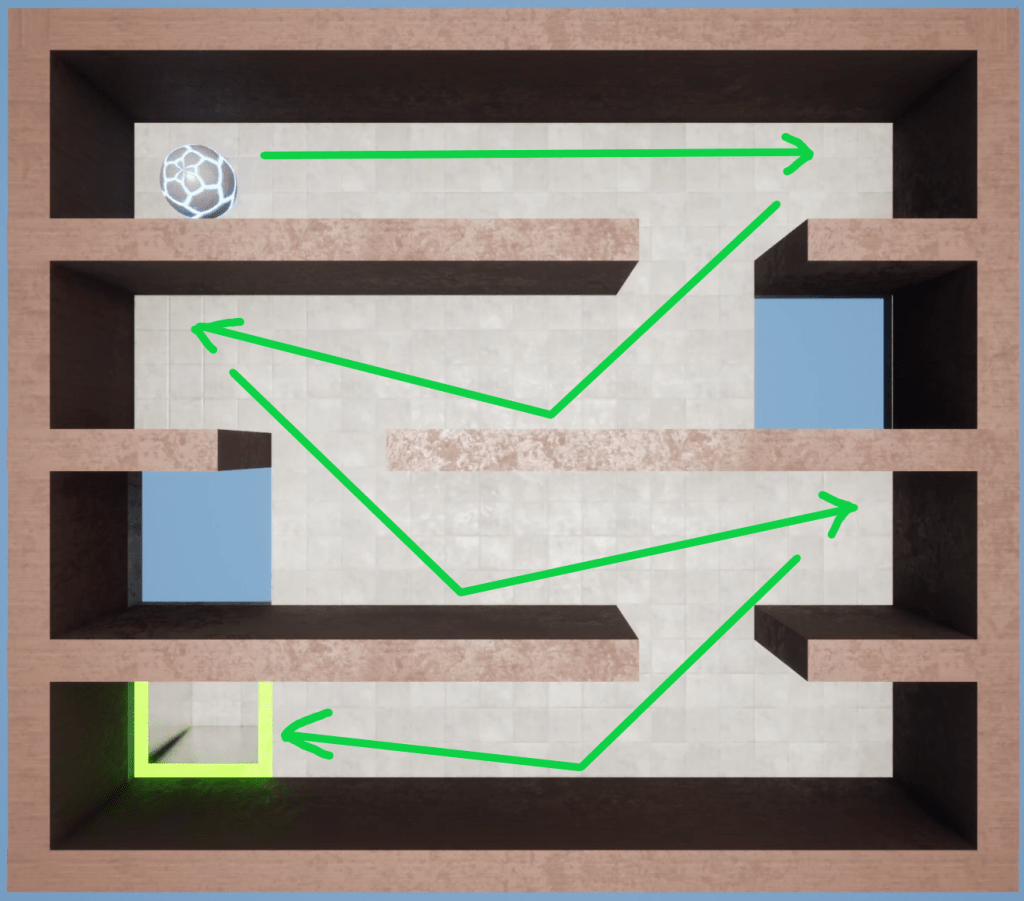
Method B (Walls)
Zone 3 – Watch Your Step
Design Overview
New Mechanic: Trapdoors/Pitfalls
The goal of this section is to force the player to move at a steady pace and not linger in one spot too long. It also requires the player to plan ahead as they could now, through lack of control or poor route planning, enter into a fail state and be unable reach the end of the maze.
My general design philosophy was to teach the player these ideas; keep moving, watch your positioning, and stay in control.
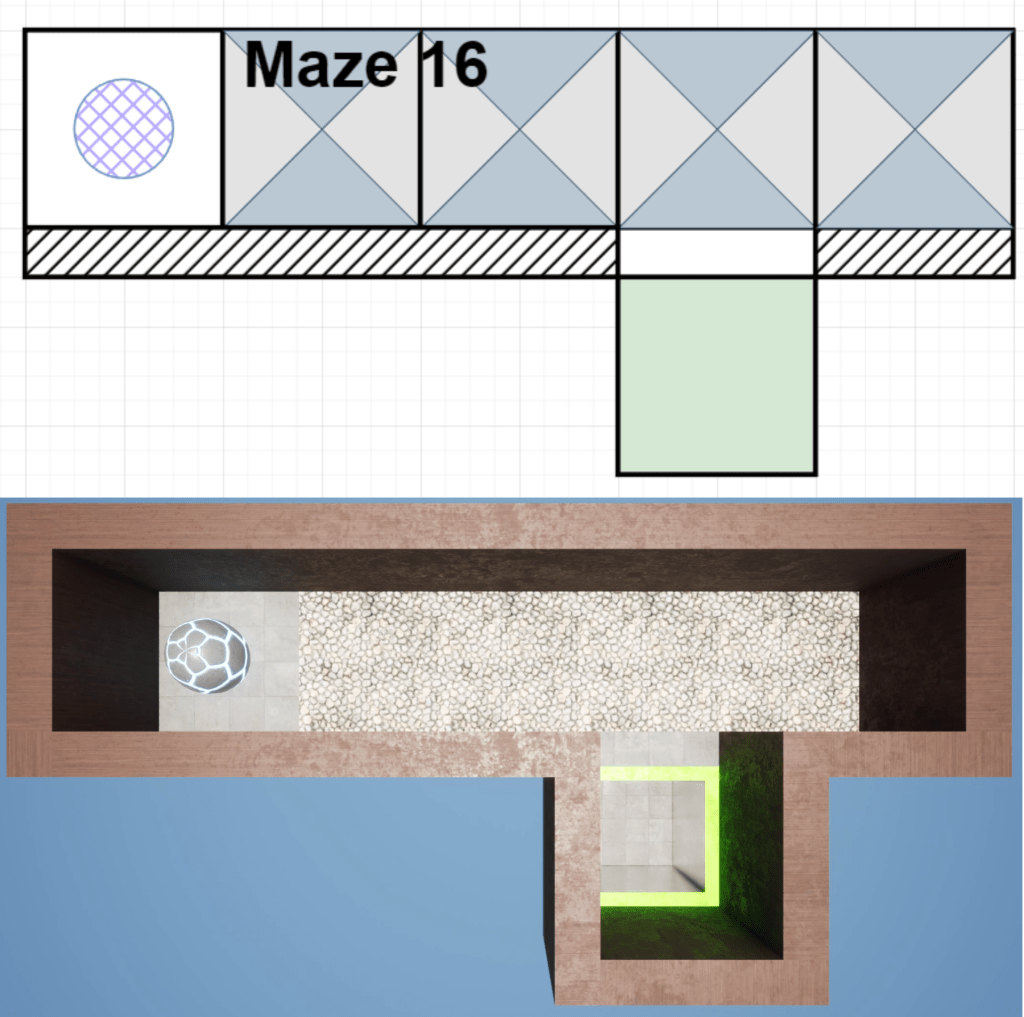
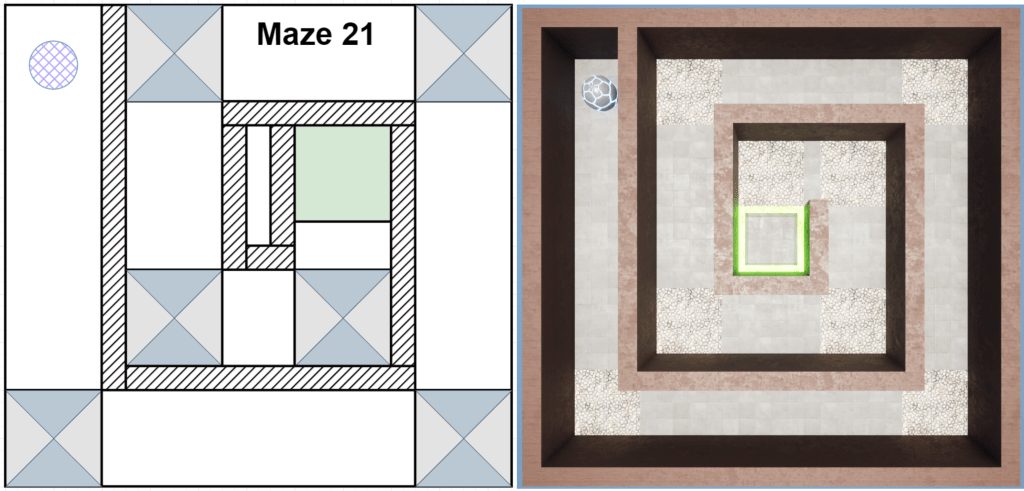
Level 3-3 (Maze 21), keeps the player moving and encourages them to change direction to avoid getting stuck in corners.
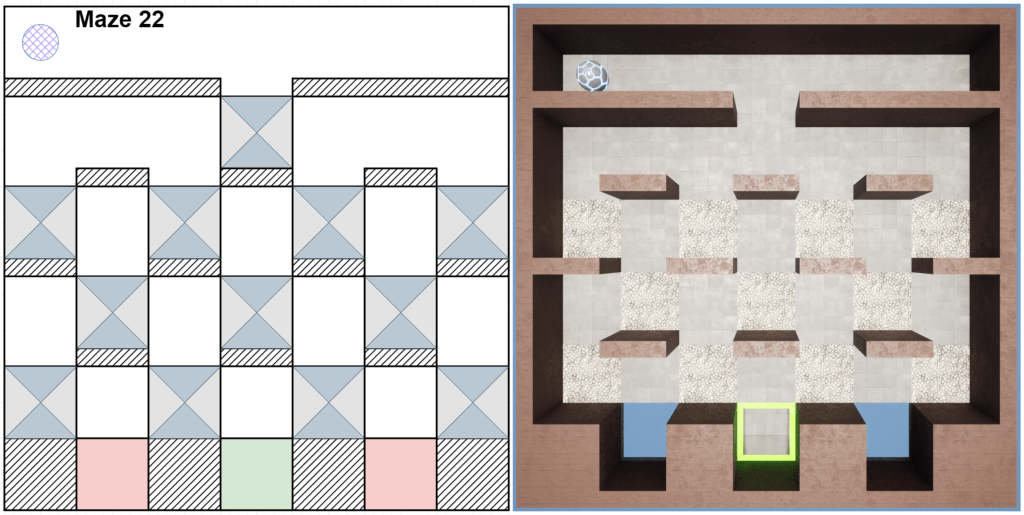
Level 3-5 (Maze 22) is all about the player planning their route. Getting stuck in one spot too long can quickly lead to failure.
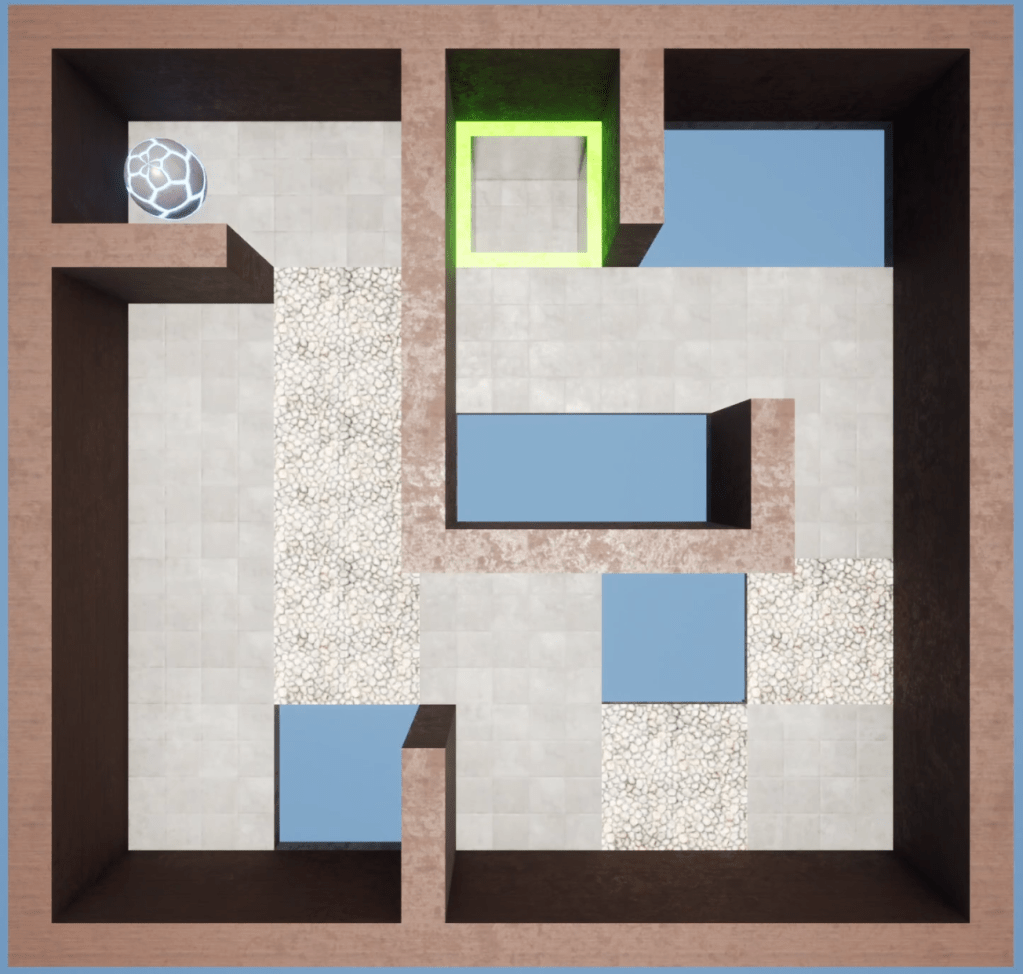
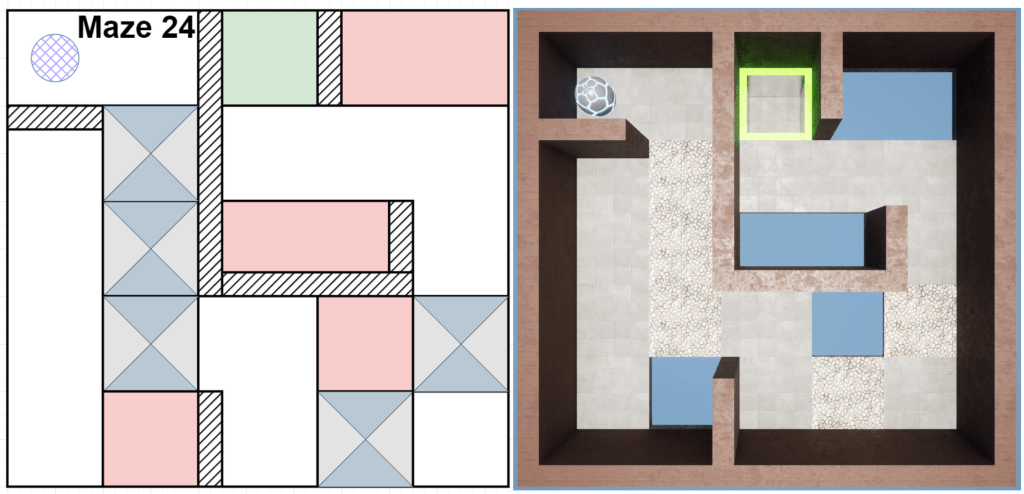
Level 3-7 (Maze 24) has multiple locations where the player has to remain in control & alternate speeds; quick over a trap and immediately slow down or turn to avoid a hole.
Level Deep-Dive
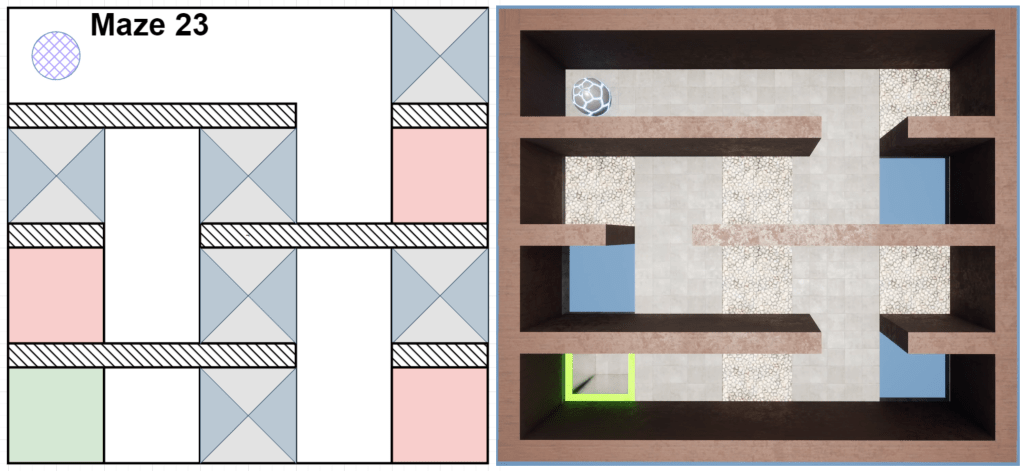
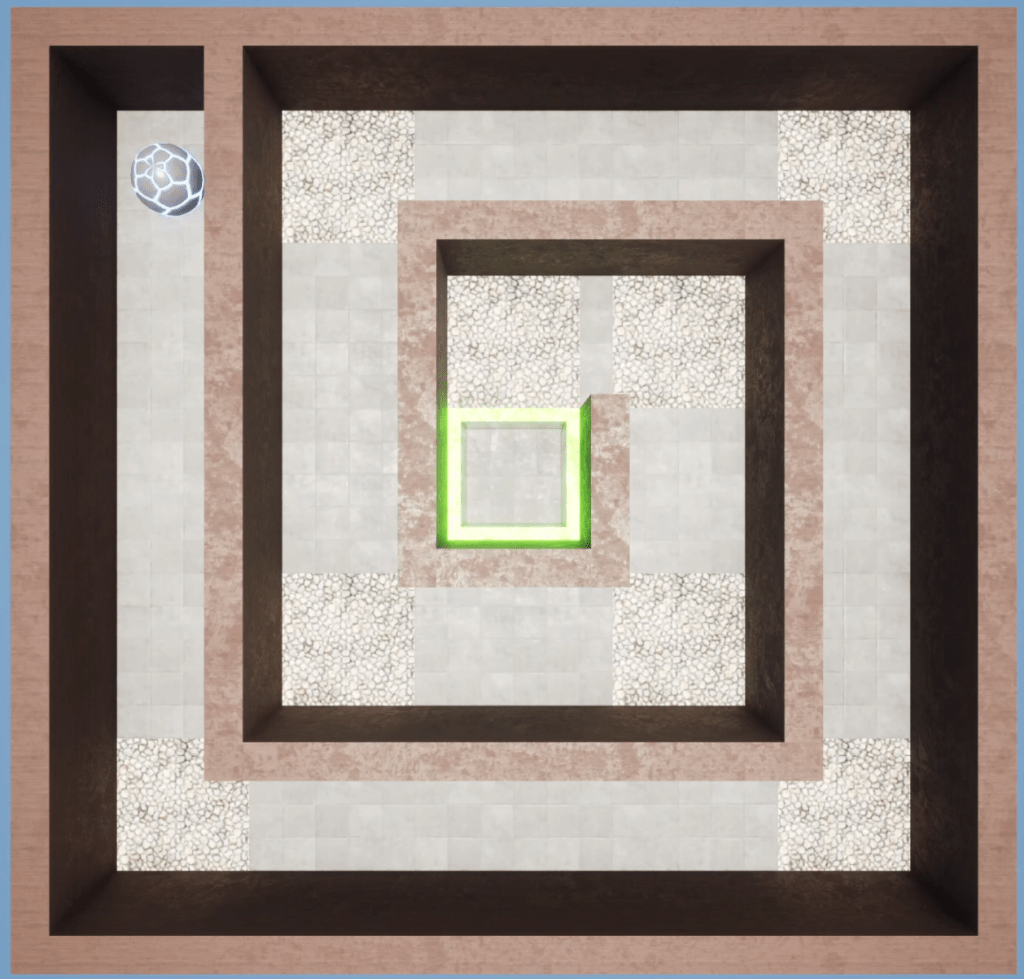
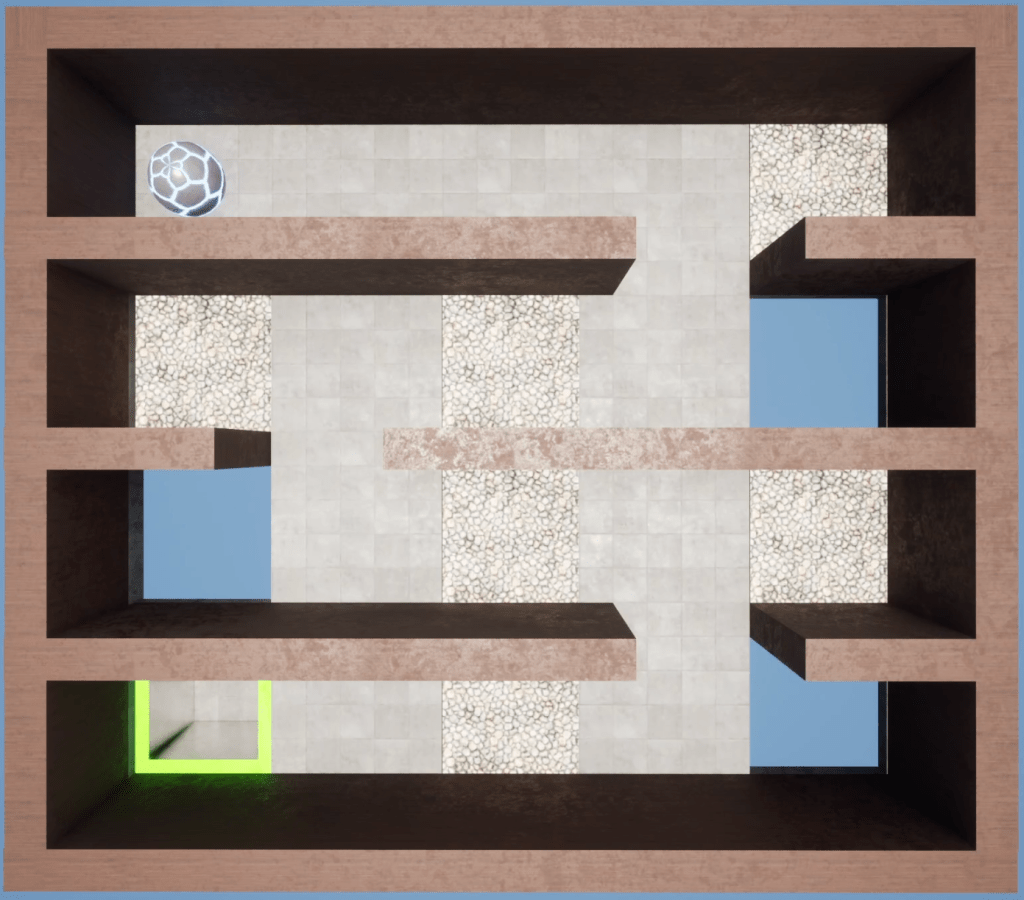
The best example of the skills I want the player to improve on comes from Maze 23, which repeats the basic design of Maze 9 from the previous zone. As discussed in my Level Deep-Dive above for Zone 2, Maze 9 allowed the player to safely roll into corners and take a safe line around hazards at their own pace. For Maze 23 I placed trapdoors both in the corners and throughout the path; particularly where I expected the player to slowdown just before a turn. Now whichever method player uses there is an added time component pushing them forward.
Maze 9
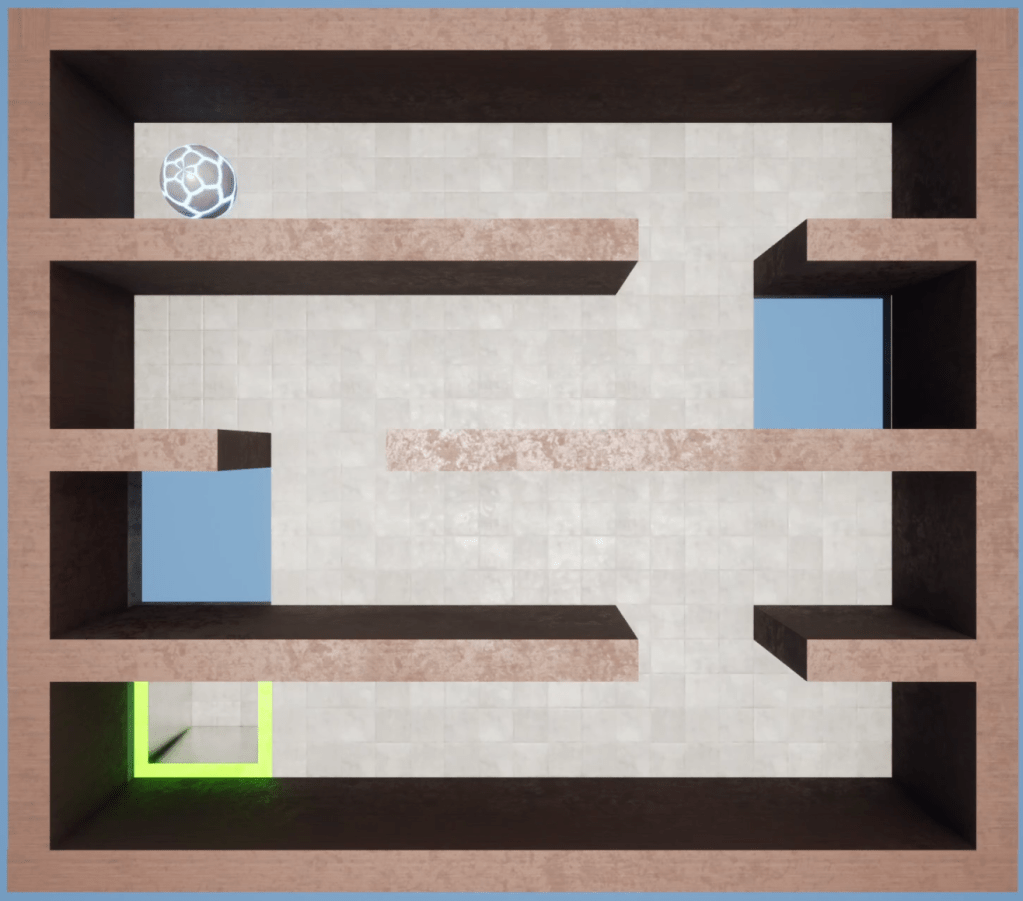
Maze 23
Zone 4 – Open Sesame

Design Overview
New Mechanic: Buttons & Activated Objects
Where the first three zones were focused on getting players acclimated with control of their movement, this section focused more on the maze aspect of the levels. I wanted to create some unique mazes that would guide the player through the level while avoiding hazards along the way.
Level Deep-Dive
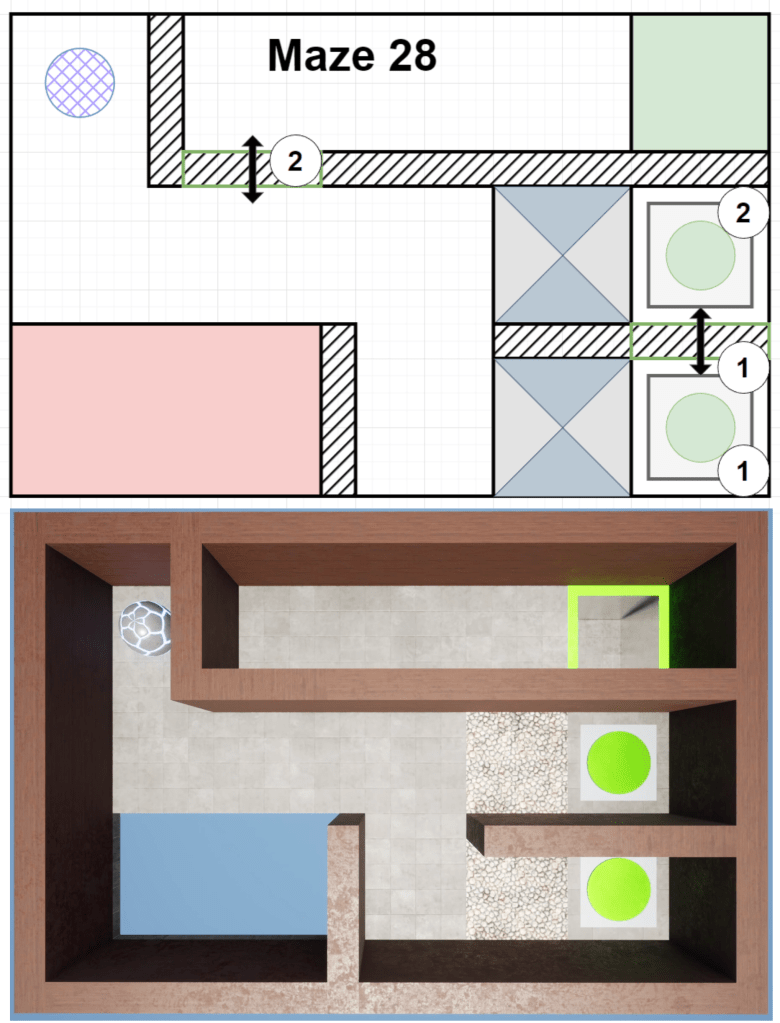
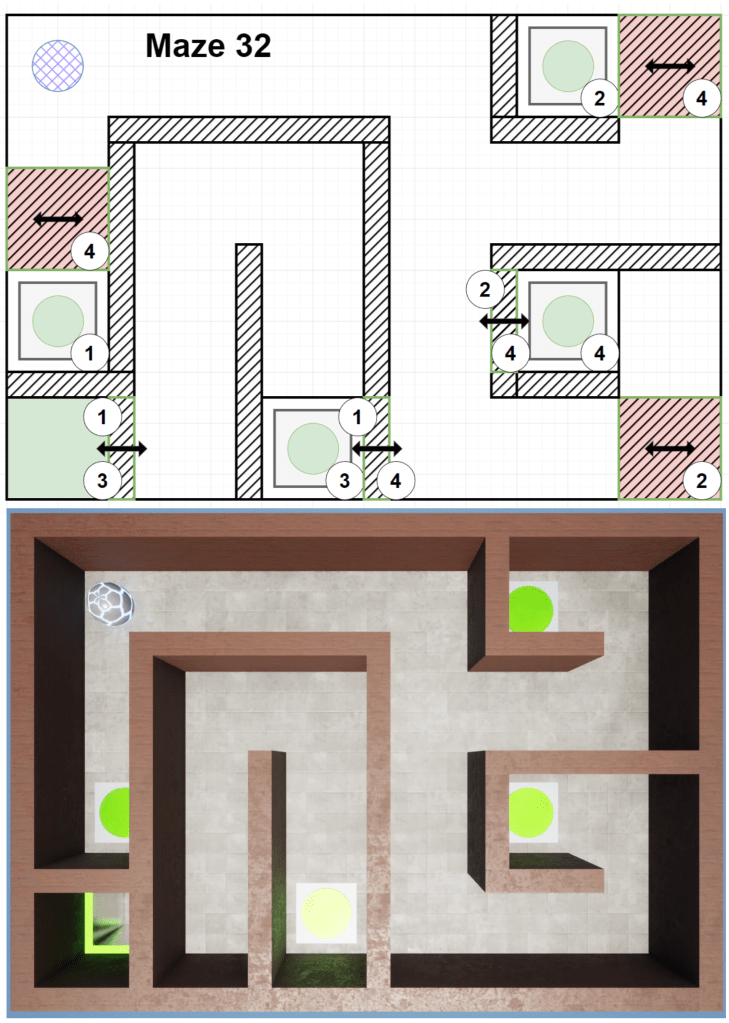
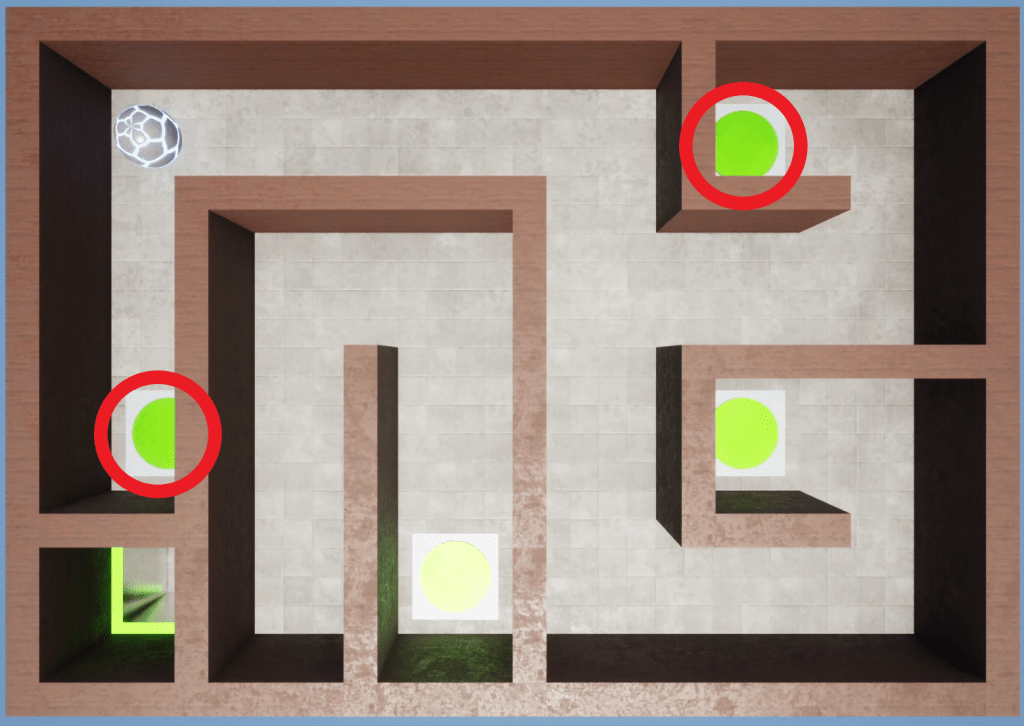
The two levels I think are the weakest are 4-3 (Maze 28) & 4-7 (Maze 32), primarily because they are the levels I created with the expectations the player would fail at least once. While failure is certainly possible in many levels, failure here is due to conditions in the design rather than challenging mechanics.
The buttons that trigger a fail-state are circled in the images below.
Maze 28
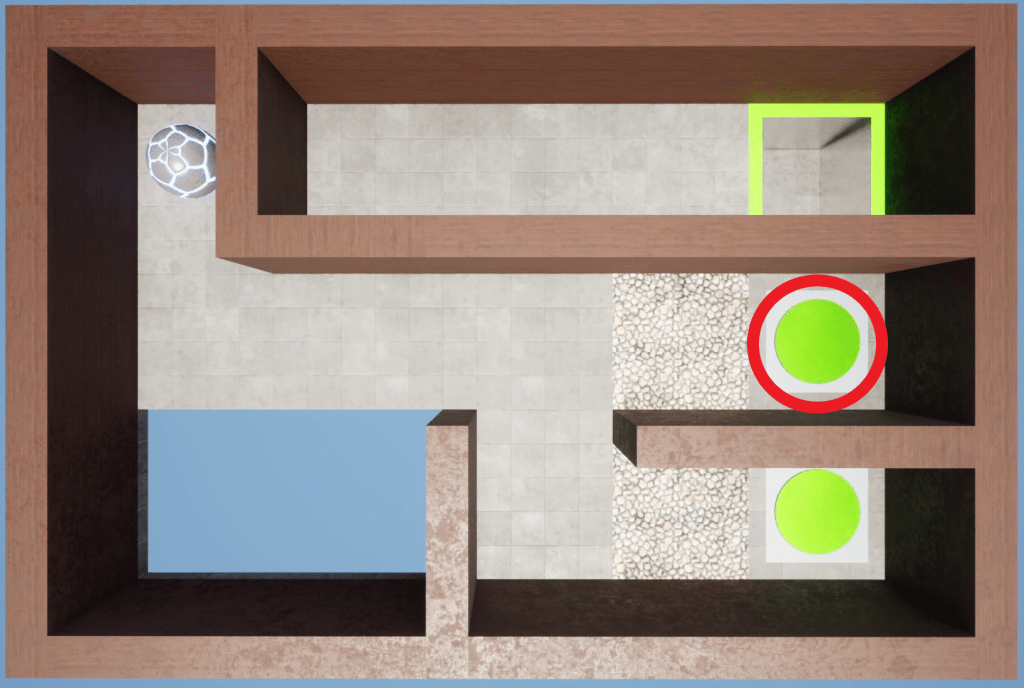
Maze 32
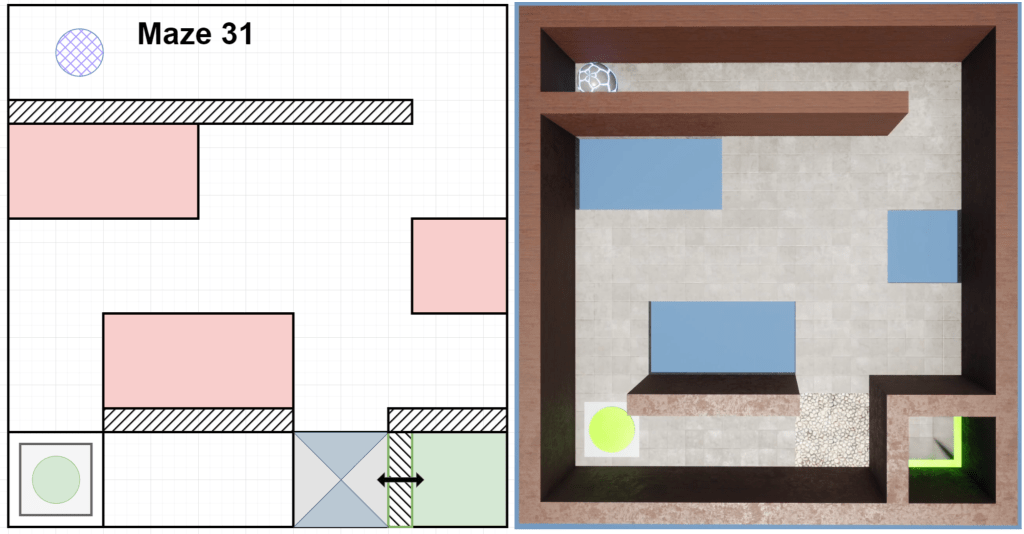
I personally like the idea of levels where the player learns the correct route through trial and error, but I admit they are slightly out of place among the rest of the levels. Level 4-6 (Maze 31) below is perhaps a better implementation of this idea. In that level if the player enters into a fail state it’s because they failed to study the level first and chose a poor route rather than as a result of ambiguous design. Although, it could also be improved with a minor tweak or two.

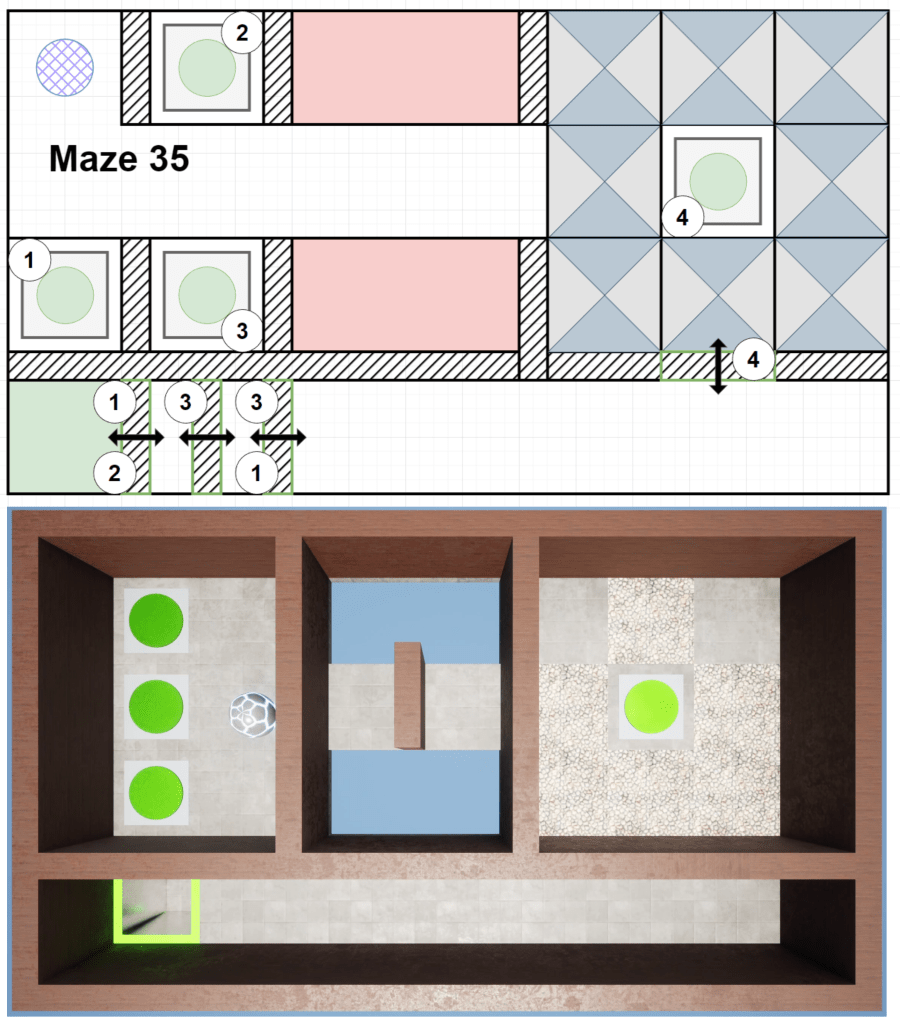
Also a bit out of place is Maze 35 (L4-10 below), which contains the only real puzzle-centric maze where the player must toggle multiple buttons to open a series of doors. I would have liked to implement more levels of this nature but never got into a good rhythm when it came to designing these types of puzzles. If I were to expand this mechanic I would probably do a different zone entirely that was focused on more puzzle based mazes. I’d also probably need to expand on the functionality of the system, something I tried to avoid doing as much as possible.
Maze 35 is also the one that went through the biggest changes from concept to “final” build in this Zone. I hesitate saying final as without proper playtesting you can never truly know if a level is done or not. However, having my friend play this level did shine some light on several issues.
First, the doors should be moved up from the bottom lane. It’s too easy otherwise for the player to roll straight to the final button and get trapped or fail. The doors don’t need to be off to the side, they’re the main puzzle here so they should be front and center blocking the player until they’re solved.
Secondly, the buttons; having them in their own little cubbies was annoying to navigate and didn’t give a good sense of order. It just made them frustrating to interact with.
Lastly, button 4 being surrounded by trapdoors was much more difficult than I wanted. Removing just 2 of them gave the player some safe spaces to wait for the door to open after triggering the button but still required them to remain in control and not accidentally destroy their path forward by triggering the traps early.
Zone 5 – Slip & Slide

Design Overview
New Mechanic: Ice/Slippery Floors
The idea with this section was similar to that of the trapdoors, a slippery surface would reduce control for the player, necessitating more cautious movement & choosing their routes carefully as changing direction & speed on ice would be difficult. Overall players would have to avoid high speeds or risk losing control.
This mechanic far and away took the most amount of time for a few reasons. First was the actual logic had to be changed to function better, but more so I spent a lot of time trying to get the feel closer to how I envisioned it working. I’m still not fully happy with how it functions but for a prototype it does the job.
Level Deep-Dive
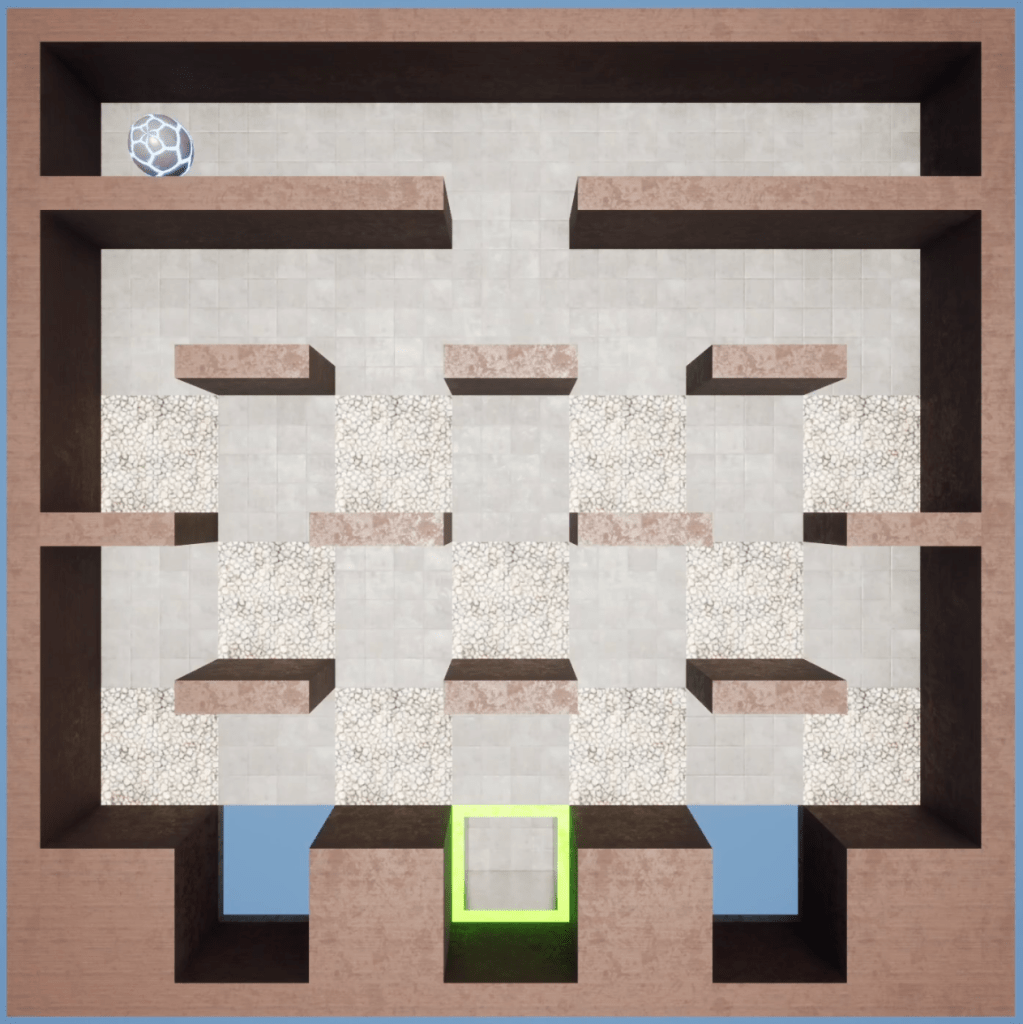
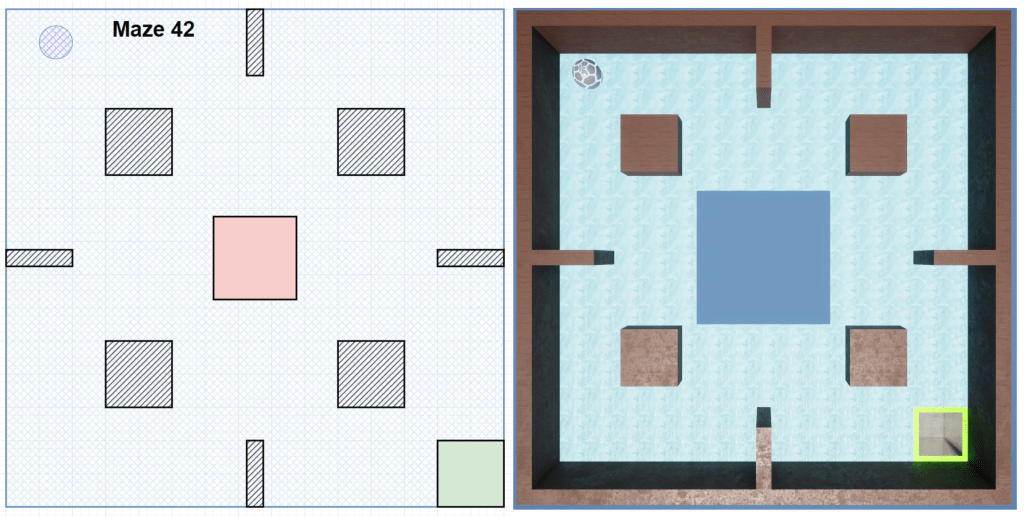
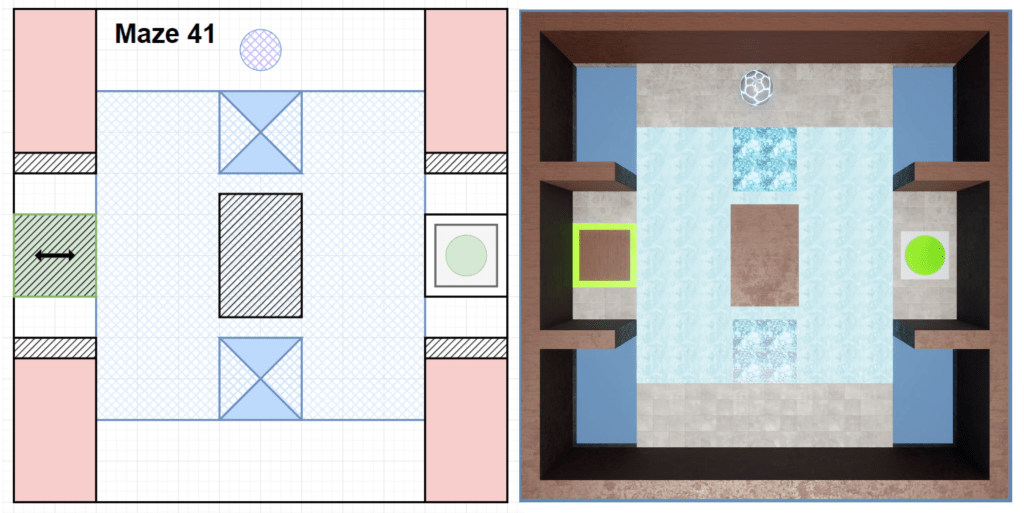
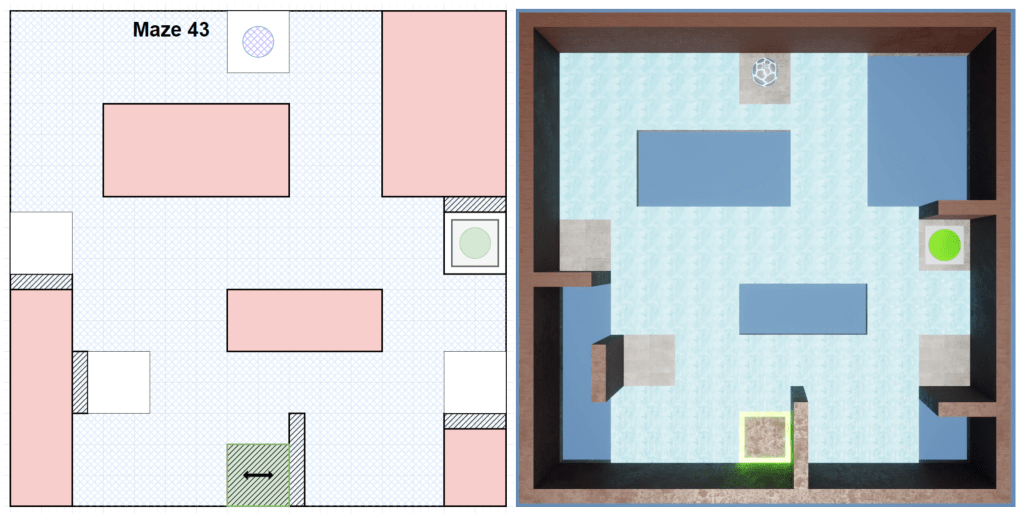
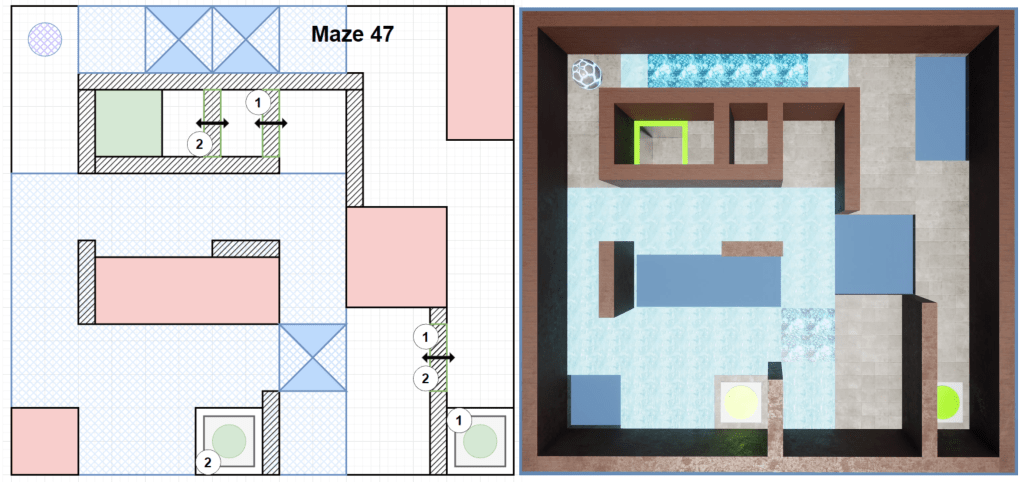
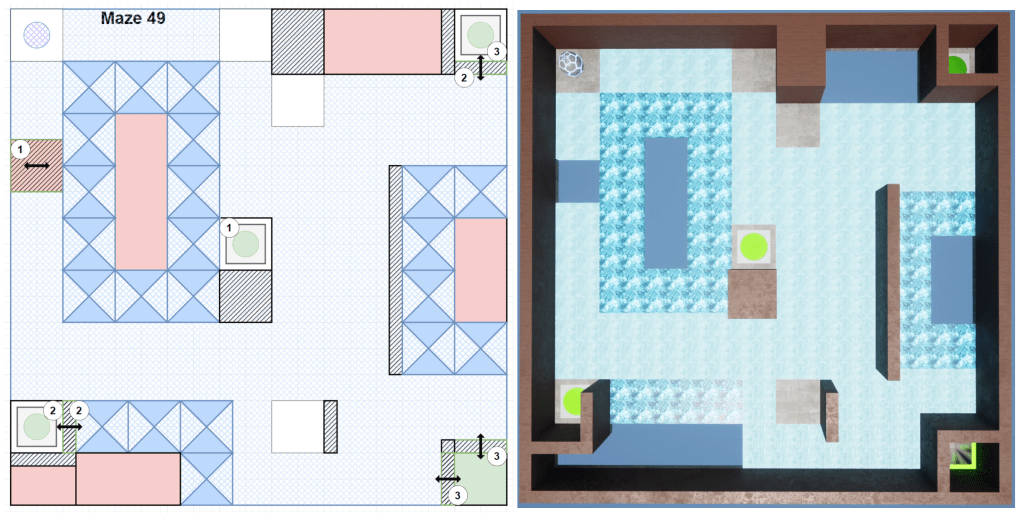
My favorite levels that best exemplify how I imagined the mechanic working come from Maze 43 & Maze 49, which I call my Pokémon-lite levels. I didn’t want the ice to take complete control from the player, but with a loss of friction this seemed like a fun design methodology to explore. Players could still navigate the mazes as they wished if they were capable enough, but the Mazes were designed to have a “correct” path.
Maze 43
Maze 49
Q & A
Q: What mechanics were the most challenging to design levels for?
A: In order: Buttons (Z-4), Intro (Z-1), Holes (Z-2), Trapdoors (Z-3), Ice (Z-5).
Zone 4 was difficult as I wasn’t fully sure where I wanted to go with them. Were they puzzles? Mazes? What was the challenge here? I haven’t really designed puzzles before so wrapping my head around buttons toggling multiple objects was challenging at times.
Zone 1 was simply the first and making mazes without a mechanic or challenge to build around was difficult at first, but if I went back now I’m sure I feel it would be easier.
Zone 2 I was also still refining my process and so it was at times challenging but having a mechanic to build around and an idea of what skills I wanted the player to learn helped immensely.
Zone 3 and 5 are similar stories, I had the clearest picture of what I wanted the mechanic to be and how I envisioned the player would interact with it. Plus with most things the more you do something the easier it gets, by these points I had a better process mentally for actually designing mazes.
Q: What’s the most important thing you learned?
A: That understanding mechanics, and how they interact with one another, is key to designing engaging levels. While this is something I fundamentally knew, actually building 45 levels really reinforces it.
Q: Did you do any playtesting?
A: Yes, some actually. I had a friend of mine who I would describe as a casual, non-PC gamer complete Zones 1-4 without much incident so I feel pretty good about the general difficulty of those levels.
Q: Are you happy with the level progression?
A: Not fully, even while writing this page I saw mazes I would like to change the order of. I tried my best to order them appropriately as I designed & built them but without more playtesting I would just be guessing, so I tried not to get bogged down fiddling too much.
Q: Do you want to expand this project?
A: Yes and no. More mechanics & levels, yes. UI, adjustable settings, UX improvements, no, they aren’t skills I’m focused on at the moment. If I was going to add any non-gameplay elements it would be experimenting with something to help the player (and sometimes myself) level out the board back to 0°, either a UI component or maybe a button press. It’s still in the realm of player focused design so it doesn’t feel too off topic to implement.
Q: What happened to Mazes 35-40?
A: My lawyer has advised me not to answer that question.
